")
")
")
")

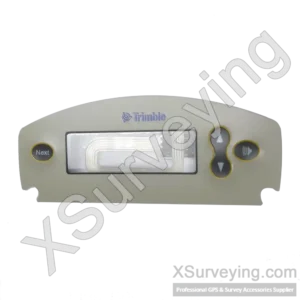
New Trimble Trimark III Keypad
The Trimble Trimark III keypad for Radio Modem is an essential component in the field of radio communication. Designed with precision and functionality in mind, the keypad serves as a user interface for the Trimark III Radio Modem, providing users with seamless control and access to its advanced features.
- Estimated Delivery : Up to 15 business days
- Express Shipping & Returns : On all orders over $200
The Trimble Trimark III keypad for Radio Modem is an essential component in the field of radio communication. Designed with precision and functionality in mind, the keypad serves as a user interface for the Trimark III Radio Modem, providing users with seamless control and access to its advanced features.
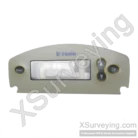
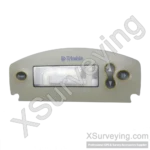
Front Panel & Keypad
Display & Indicators
The front panel’s VFD shows the current channel frequency, transmit power level, operating mode (Base/Rover/Repeater), and alarm or error messages. Status LEDs adjacent to the display indicate link activity and power status at a glance.
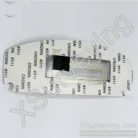
Control Keys
Four sealed push-buttons beneath the display allow full field configuration:
- SPEAKER: Toggles and adjusts the audio monitor for received RF traffic.
- UP / DOWN: Scroll through menu items and adjust numeric settings (e.g., channel number, power level).
- NEXT: Advances between menus such as Channel, Power, Mode, Diagnostics, and About.
Menu Navigation & Configuration
Press NEXT to cycle through major menus; use UP/DOWN to modify parameters within each menu. The menu hierarchy includes:
- Channel: Select from up to 20 programmed channels.
- Power: Choose transmit power (2 W, 10 W, or 25 W) to balance range and battery life.
- Mode: Set the unit as Base, Rover, or Repeater; repeater modes support up to two hops depending on data rate.
- Diagnostics: View RSSI, carrier detect, and error logs.
- About: Displays firmware version and serial number.
Field Operations
Changing Channel
When the modem is idle (not transmitting), enter the Channel menu, then use UP/DOWN to select the desired channel; the display updates instantly.
Adjusting Transmit Power
In the Power menu, scroll to the desired output:
- 2 W: For short-range, low-power applications.
- 10 W: For standard coverage.
- 25 W: For extended range over challenging terrain.
Setting Operating Mode
Switch between Base, Rover, and two Repeater modes directly on the front panel; ensure the Base and its Repeaters share identical channel and mode settings for proper network operation.
Installation & Maintenance
- Mounting: Install in a sheltered location; panel and keypad remain fully operational in rain or dust.
- Power Connection: Connect a 12 V DC source to the POWER port—observe correct polarity to avoid blowing the 10 A inline fuse.
- Antenna: Use a 5 dB VHF whip antenna, mounted above obstructions for best performance.
- Inspection: Periodically verify button responsiveness and display clarity; replace the unit if the front-panel seal or display degrades.
Troubleshooting
- No Display / No Key Response: Confirm 12 V DC supply and fuse integrity.
- Intermittent Link: Use the Speaker function to listen for background noise; adjust channel or power as needed.
- Configuration Reset: After firmware upgrades, re-verify front-panel settings against your network plan.
By leveraging the Trimark III’s intuitive front-panel interface, surveyors and technicians can rapidly deploy and maintain reliable RTK radio links entirely in the field.
| Weight | 0.2 kg |
|---|---|
| Dimensions | 18 × 12 × 10 cm |
Q & A
 New Trimble Trimark III Keypad
Related products
-
New Ag Leader Compass Touchscreen
Original price was: $100.$90Current price is: $90.

")


")

")


")


Reviews
There are no reviews yet